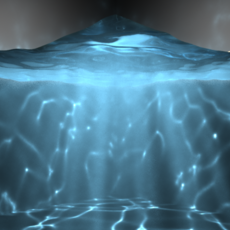
2. Scene setup
See CausticsAutodesk2014x64_2.0.0_SceneSetup.ma for a completed setup file to skip this section.
NOTE: If you are creating these objects for practice, it’s easier to create exact primitives when you turn off interactive creation and simply change the input options in the channel box after creating each shape from the corresponding “Polygons” shelf button. The outliner is also very handy for easily selecting objects
(Window > Outliner).
2.1. Water surface plane
Create a poly plane: Name (“waterSurface_pPlane1”), Size (10 Width, 10 Height), Subdivisions (100 Width, 100 Height),
Position (0, 0, 0)
2.2. Camera
-
Create a camera from the perspective viewport (CTRL + SHIFT + C)
-
Select the camera and set attributes: Name (“shotCam_persp1”),
Position (9.5, -1, 9.5), Rotation (0, 45, 0) -
Lock translation, rotation and scale channels (select channels in “Channel Box”, right click > lock selected)
-
Display Resolution Gate — I like putting this on so I can preview the shot as it will render (select “shotCam_persp1” viewport panel > View > Camera Settings > Resolution Gate \\OR\\ select camera and open Attribute Editor > “shotCam_persp1Shape” tab > Display Options > enable “Display Resolution” and “Display Gate Mask”)
2.3. Area light
Create an area light which will be used to cast photons into the volume: Name (“photonEmitter_areaLight1”), Position (2, 2, 2), Rotation (-67.5, 45, 0), Intensity (250), Decay Rate (“Quadratic”)
2.4. Area light plane
This is basically just a shape that represents the “bulb” of the area light so that its source location shows up in the renders as a white self-illuminated square. Otherwise, the light looks odd like it’s not really coming from anywhere specific.
-
Create a poly plane: Name (“photonEmitter_pPlane1”), Size (1 Width, 1 Height), Subdivisions (2 Width, 2 Height)
-
Make it a child of “photonEmitter_areaLight1”: make sure “photonEmitter_pPlane1” is selected in the viewport, open the Hypergraph (Window > Hypergraph: Hierarchy), press “F” to frame the selection, then middle-mouse dragging it over to “photonEmitter_areaLight1”, close the Hypergraph
-
Update local coordinates: Position (0, -0.5, 0), Rotation (90, 0, 0)
-
Disable receiving and casting shadows: open the Attribute Editor (CTRL + A), select the “photonEmitter_pPlaneShape1” tab > “Render Stats” > disable both “Cast Shadows” and “Receive Shadows”
-
Hide for now since it shadows photons later on: select “photonEmitter_pPlane1”, create a new layer and assign selected objects, rename layer to “AreaLightPlane” and diable “Visible”
2.5. Environment cube
-
Create a poly cube: Name (“environment_pCube1”), Size (10 Width, 10 Height), Subdivisions (1 Width, 1 Height), Position (0, 0, 0)
-
Turn off double-sided rendering (Attribute Editor > “environment_pCube1Shape” tab >
Render Stats > disable “Double Sided”) -
Reverse Normals (Polygons mode > Normals menu > Reverse)
2.6. Photon boundary cube
-
Create a poly cube: Name (“photonBoundary_pCube1”), Size (20 Width, 20 Height), Subdivisions (1 Width, 1 Height), Position (0, 0, 0)
-
Turn off double-sided rendering (Attribute Editor > “environment_pCube1Shape” tab >
Render Stats > disable “Double Sided”) -
Reverse Normals (Polygons mode > Normals menu > Reverse)
Test render 1
At this point, the only things you will see when rendering are some default shaders and the area light casting some light into the scene. Notice that no shadows appear, and that is because the area light uses raytrace shadows by default, and Maya’s Software Renderer’s default settings have raytrace shadows disabled.
Author: david allen
Submitted: 2014-05-14 18:18:06 UTC
Tags: coustics, maya, refractive, reflective, and volumetric
Software: Maya
Views: 58,947
Related Items
-
Animated Olympic Fire 2014 (Maya) 3D Model
$69.00 (USD) -
Elephant 3d textured model 3ds max and maya scene files 3D Model
$30.00 (USD) -
1-Click Texture Batch Bake for Maya for Maya 1.0.0 (maya script)
$20.00 (USD) -
"Rapid Rig: Poser" for Maya for Maya 2.0.9 (maya script)
$20.00 (USD) -
Nick-Maya Rig With Advance Facial Setup for Maya 0.1.0
$20.00 (USD) -
Pamela Maya (2013) Rig for Maya 0.0.1
$20.00 (USD) -
The Alchemy Tools for Maya for Maya 1.0.0 (maya script)
$20.00 (USD) -
Arab Rig for Maya with Ncloth simulation for Maya 0.0.1
$99.00 (USD) -
Poly Tools for Maya for Maya 0.4.2 (maya script)
$20.00 (USD)


